How to Use Our Price Estimator
We know that when it comes to custom t-shirt printing, there are thousands of options out there. Going through the creative process of designing your garments requires many decisions to be made, and tiny alterations in your design or garments can results in big price changes. Making the creative decisions like adding another color to your design or putting your logo on the sleeve can impact your total cost. You want to create the ideal version of your product while staying within budget.
On our website we have a handy tool we like to call the price estimator. It’s available to use with every garment on our website and gives you an accurate cost for your custom apparel order. We use it when determining cost and if you have been wondering how it works, this post is for you!
The price estimator is a helpful way to figure out how much your order will cost.
We want your ordering process to be as smooth as possible so that you can experience efficiency from start to finish. As a team of people with experience in the custom screen printing industry, we strongly believe that you have the right to know what you’re spending your hard earned dollar on. There are never hidden costs with us. We have a price calculator built into our website so you know how much your order will cost. This calculator includes everything you need to know about your total costs, including adding customizations like hem tags, folding and bagging, and pricing for larger apparel sizes.
When looking at this tool, it can seem a little daunting. There’s no need to feel overwhelmed by the possibilities. Our Customer Account Specialist, Syd, walks us through the process using the price estimator.
Syd says that this tool “can be super helpful and straightforward once you start using it.”
If you have a game plan, or have done this before then it’s straightforward. If not, it’s easy to get overwhelmed by the possibilities when you go to our website. We have a couple hundred garments on our website and these are just a portion of what is available to you. So what can you do?
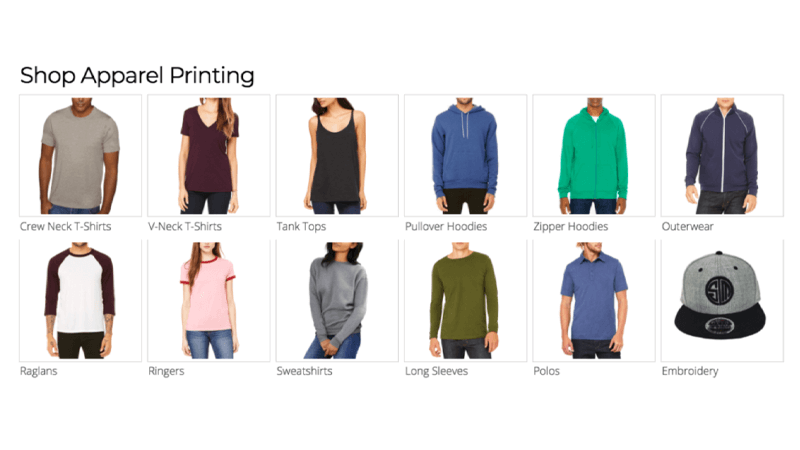
This is where you decide whether it’s a crew neck, pullover hoodie, or something else, then you can filter even further.
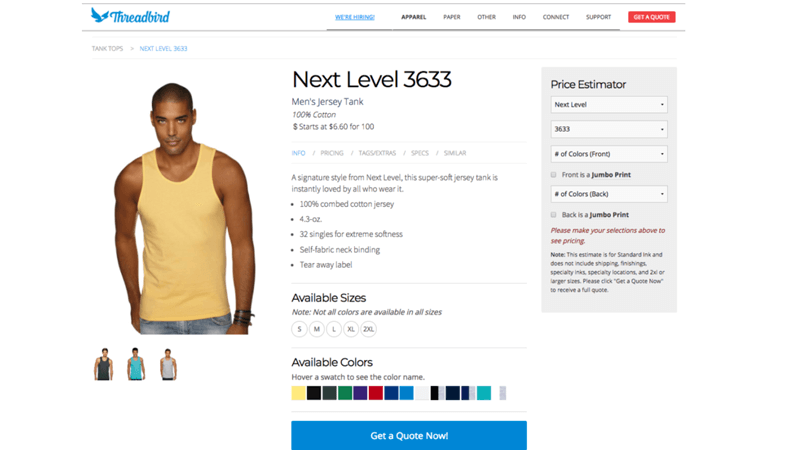
You can filter by material, category, brand, and price. Once you find a garment that you like, notice the price estimator. It should be to the right of the garment on a desktop and under the product description and colors when viewing on a mobile device.
Let’s go through the process together.
So you’ve decided on the Next Level 3633 Tank.
We see that the cost of the tank with a one color print would be $6.60 at a quantity of 100 shirts.
On the righthand side in the price estimator box, put the number of colors that are in in your design for the front and the back of the shirt.
It’s important to know exactly how many colors your artwork has. For example, if your design is a gradient it’s not just the two main colors, but all the shades in between. This also is not the CMYK color numbers, just the number of individual colors in your design. We explain more about artwork creation and file prep on our website.
Something that you may not realize is that each additional color and location added will increase the price because each color requires its own screen. If your design is over 17 inches, then it’s considered a jumbo sized design and the minimum quantity increases.
For this example, let’s use the Threadbird logo with a blue bird and black lettering. Using this example, the amount of colors is two on the front, no colors on the back, and this is not considered a jumbo design.
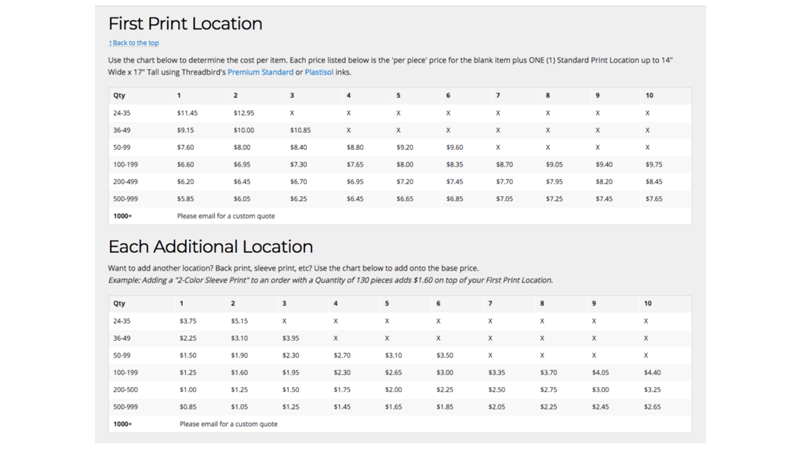
When you select the number of colors on the “Front” dropdown, you will see a table showing the cost per shirt based on total quantity ordered underneath!
You can see all the pricing and if there is an “x” listed, that quantity is unavailable with the number of print colors currently selected.
We see that the minimum quantity of 24 shirts is an option, and that each shirt costs $12.95. In regards to shirt colors, we can split different color shirts if its the same shirt, but must print at least 12 of each color. We can also do an ink change fee sometimes instead of doing two completely separate set ups.
Scroll down to find charts explaining the cost per shirt when adding things like additional colors, print locations, and finishings. For example, if I want two of my 24 shirts to be size 2XL, these will cost $14.70 each (12.95+1.75).
In the “each additional location” table, see how much it costs to add another spot with each number of colors. Add this to each cost for individual shirts. So if we wanted to add another Threadbird logo on the left sleeve, it would cost $5.15 per garment if we only order 24-35. You can quickly see how much more cost-effective it is to order in larger quantities.
If you keep scrolling, you see the finishings section. This includes tag printing, hem tags, folding and bagging, and hang tags.
So there you have it!
If this ever feels confusing, our CSRs are here to answer questions and do any calculations for you. We hope that this tool can be used to make your ordering process smoother and better. Ready to try it out? Head to Threadbird to create your first estimate!
